
Valheim Best Graphics Settings for High FPS (2026 Optimization Guide)
Valheim looks like it should run on a toaster. Chunky low-poly trees, a soft painterly palette, a Viking cosplaying as a lumberjack. Then you build a proper longhouse, light up forty torches, terraform a hillside into a parking lot, and your 144 Hz monitor starts delivering a slideshow.
I’ve sunk hundreds of hours into the Tenth World, and nothing has wrecked my mood quite like a base that crawls once it passes the 15,000-instance mark. The frustrating part is that Valheim doesn’t punish you for having a weak GPU. It punishes you for being ambitious. Big builds, busy farms, wolf pens, and terrain edits all pile work onto your CPU, and the engine doesn’t handle that load gracefully.
So here’s the full breakdown of what actually helps, what’s a waste of time, and what I’d change first if you only have ten minutes.
Why Valheim Chokes (Even on a Monster PC)
Valheim runs on Unity, and it leans hard on the processor. Every creature, every placed beam, every dropped item, and every AI routine adds to a per-frame workload. Your GPU is rarely the one sweating. Even a shiny RTX 40/50 card or a Ryzen X3D chip can sink to 20-30 FPS inside a huge co-op fortress if the settings and base layout are sloppy.

That changes how you should tune the game. Most “just lower everything” advice is wrong here. You want to spend GPU headroom freely, save CPU cycles aggressively, and keep the game’s moody lighting intact. A Valheim with every shadow stripped out looks like a mobile port, and nobody downloads a 4K Viking sim to stare at flat paper.
The In-Game Settings I’d Lock In
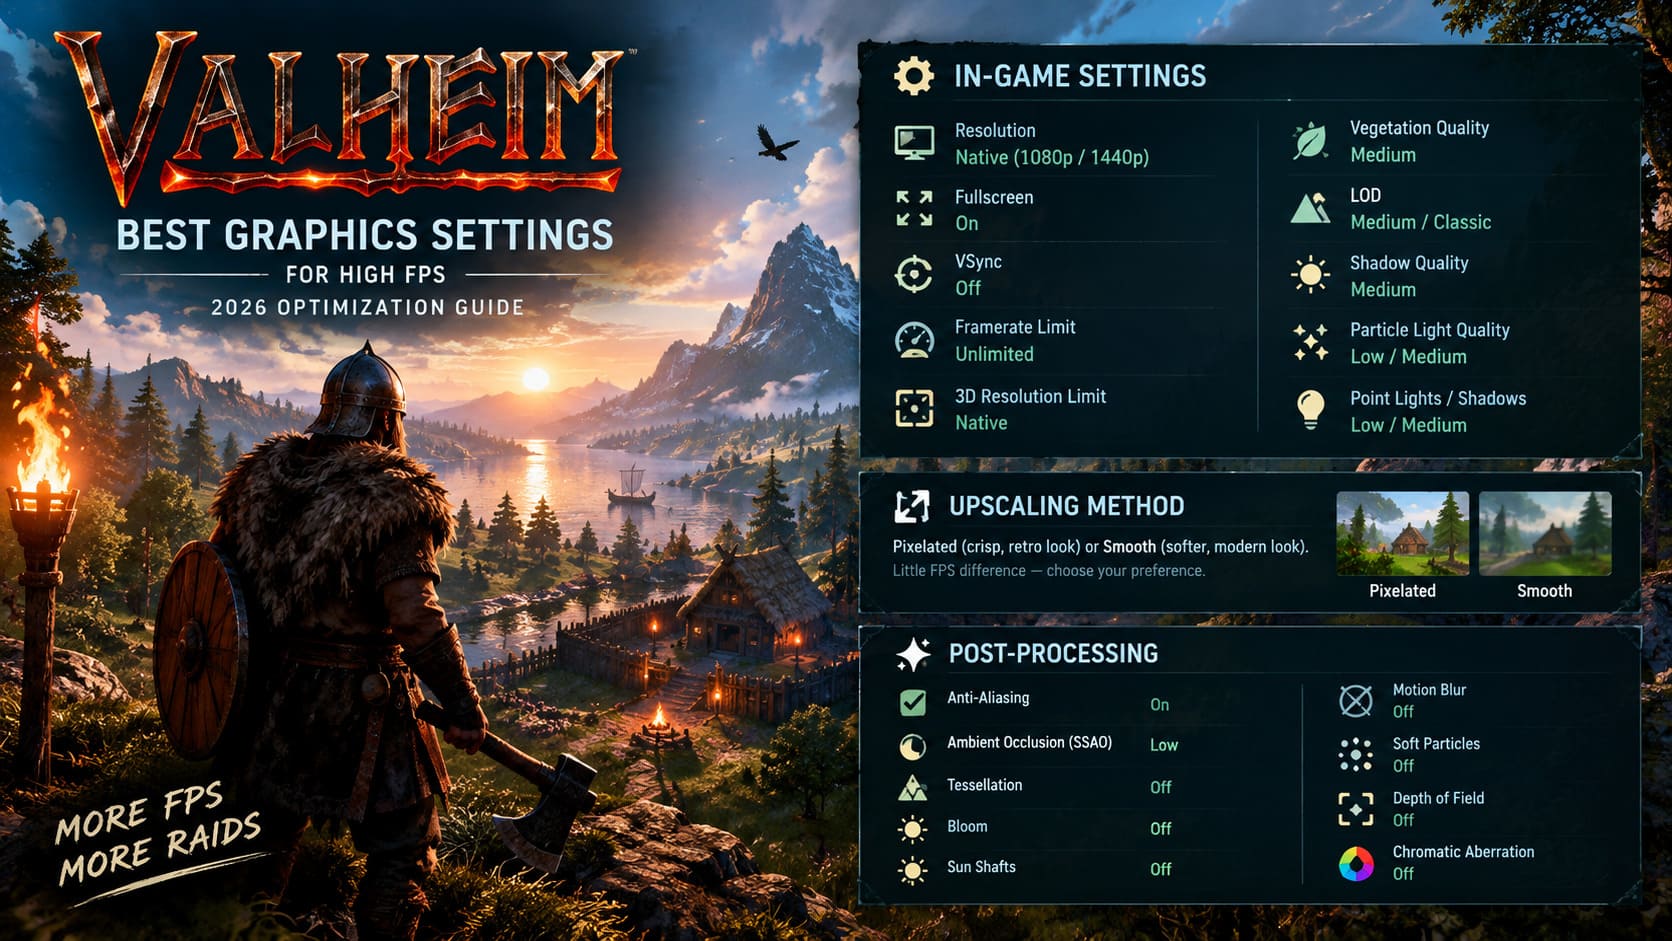
Open the Graphics tab and work through this table. I’ve kept the reasoning short so you can copy the values and move on.
| Setting | Value | Why It Matters |
|---|---|---|
| Resolution | Native (1080p / 1440p) | Dropping resolution by hand gives you a smeared mess for tiny gains |
| Fullscreen | On | Windowed and borderless modes cause micro-stutter and the occasional crash |
| VSync | Off | Removes input delay; limit tearing from your GPU driver instead |
| Framerate Limit | Unlimited | Let your hardware stretch its legs |
| 3D Resolution Limit | Native | Auto-scaling turns combat and bad weather into a blur |
| Vegetation Quality | Medium | Roughly 3-4% more FPS, and the forests still look full |
| LOD | Medium or Classic | High LOD hammers the CPU; Classic/Medium can win back up to ~15% |
| Shadow Quality | Medium | Around 10-20% saved, and fog and night scenes get steadier |
| Particle Light Quality | Low or Medium | Big win in boss fights and crowded crypts (~12% smoother) |
| Point Lights / Point Light Shadows | Low or Medium | Your torch-covered base is the main reason you’re lagging |
Upscaling Method: Pick Your Flavor
This one is personal taste. Pixelated gives a crisp, slightly retro look. Smooth blends the pixels for a softer, more modern image. Neither moves the FPS needle much, so go with whichever your eyes prefer.
The Vegetation Trap
I know the temptation: set Vegetation to Low, watch the counter climb. Don’t. The Meadows turn into a bald patch, and the Black Forest loses the dense, claustrophobic feel that makes it scary. It also hurts gameplay, since you can see enemies and resources from way too far away. Medium is the sweet spot. You keep the atmosphere and still grab a small gain.
Point Lights Are the Silent Killer
If your base looks like a Christmas market, this is your villain. Every torch and campfire casts real-time light, and every extra shadow-casting light stacks up. Set both point light options to Low or Medium and your base stops fighting you. You’ll barely notice the difference in a cozy hall, but your CPU and GPU will.
Post-Processing: Kill What You Don’t Need
The effects toggles are where I get opinionated. Most of these are eye candy that costs frames and gives nothing back in a survival game.
- Anti-Aliasing: On. Grass and thin edges look ugly without it, and the cost is tiny.
- Ambient Occlusion (SSAO): Low. Switching it off flattens the world and makes everything look like a cardboard diorama. Low keeps the depth for very little cost.
- Tessellation: Off. It adds geometry load to terrain, and you’ll feel the relief right away near edited ground.
- Bloom: Off. Cuts the harsh sun glare and nets you around 5%.
- Sun Shafts: Off. Gorgeous god-rays through the pines, I’ll admit it. They also chew through fill rate at certain times of day. Sacrifice them.
- Motion Blur: Off. Sharper image, better reaction time. Easy call.
- Soft Particles: Off. Saves frames in smoke, mist, and fire scenes.
- Depth of Field: Off. Background blur has no place when something with horns is charging you from across a valley.
- Chromatic Aberration: Off. Clean edges, no color fringing.
Turning off Sun Shafts is the only change here that really stings for me visually. Everything else, I don’t miss for a second.
Switch to Vulkan. Seriously.
If you take one thing from this guide, make it this. The graphics API decides how your CPU and GPU talk to each other, and in a CPU-bound game that conversation matters more than any slider.
Vulkan spreads rendering work across multiple CPU cores instead of piling it on one. In practice that means steadier frame pacing, fewer hitches when you sprint through new terrain, and fewer of those random disconnects that wreck a co-op session. DirectX 11 is the fallback. Only stay on it if Vulkan misbehaves with your specific driver.
How to force Vulkan through Steam:
- Right-click Valheim in your Library and open Properties.
- Stay on the General tab.
- In Launch Options, type
-force-vulkan(no quotes).
Launch the game, check the first few minutes for glitches, and compare. Most players I know never went back.
The Hidden boot.config Trick
This is the nerdy part, and it’s worth five minutes. Unity lets you enable graphics job multithreading through a plain text file, so your CPU can split rendering commands across more cores.
- In Steam, right-click Valheim, then Manage, then Browse local files.
- Open the valheim_Data folder.
- Find boot.config and open it in Notepad.
- Paste these two lines at the very top, each on its own line:
gfx-enable-gfx-jobs=1
gfx-enable-native-gfx-jobs=1- Save and close.
Expect roughly 5-10% in CPU-limited situations like big bases. It won’t turn a potato into a racehorse, but when you’re already scraping for frames, that’s the difference between “playable” and “fine.” Make a backup copy of the file first, and keep in mind that game updates can overwrite it, so recheck after a patch.
Driver Settings Worth Touching
Your GPU control panel has a few switches that help a lot, and they’re free.
| Option | Recommended Value | Effect |
|---|---|---|
| Shader Cache Size | 100 GB or Unlimited | Stops stutter when you enter a new biome |
| Power Management Mode | Prefer Maximum Performance | Keeps clocks high during lighter scenes |
| Low Latency Mode / AMD Anti-Lag | Ultra / Enabled | Cuts input lag, so parries and dodges feel instant |
If you use a DLSS or FSR override at the driver level, run the newer presets: Preset M for 1080p performance, Preset L for a 1440p/4K balance. That keeps the image clean without that over-sharpened, crunchy look.
The shader cache is the one people forget. A tiny default cache means shaders get thrown away and rebuilt, and that rebuild is the hitch you feel when you cross into a fresh area.
Fix Your Base, Not Just Your Settings
Here’s the truth nobody likes hearing: sometimes the settings aren’t the problem. Your base is. You can run the perfect config and still dip into the 20s if your build is a pile of instances with a zoo attached.
- Go easy on terraforming. Giant flattening jobs and deep digging force the engine to keep recalculating terrain. Plan your site before you start hacking at the ground.
- Cut your light count. Replace rows of resin torches with fewer, stronger sources. Wisp lights are great for this, and they look cooler anyway.
- Separate your animals. Keep tames and livestock in small enclosed pens away from your crafting hub. Fewer AI agents active near you means less CPU churn.
I rebuilt one sprawling base last season by swapping about thirty torches for a handful of bright lights and moving the boar farm to the edge of the map. The gain was bigger than anything I got from the sliders.
Quick-Start Checklist
Short on time? Do these in order and you’ll capture most of the benefit:
- Add
-force-vulkanto Launch Options. - Set Shadows and LOD to Medium, point lights to Low/Medium.
- Turn off Tessellation, Bloom, Sun Shafts, Motion Blur, Depth of Field, Soft Particles, and Chromatic Aberration.
- Edit boot.config.
- Raise your shader cache and set Max Performance power mode.
- Thin out lights and relocate animals at your main base.
Valheim 1.0 Ultimate Performance Guide: How to Increase FPS and Fix Stuttering (2026)
Final Verdict
Valheim will never be a lightweight game once you start building like a Viking with a God complex, and that’s part of its charm. But you don’t have to suffer through it. Vulkan, sane shadow and LOD settings, a trimmed light count, and a couple of driver switches will take you from stuttering mess to something that finally feels like the game deserves your hardware.
My biggest takeaway after all these hours: protect the atmosphere, cut the effects you won’t miss, and treat your base like a performance budget. Do that, and the Tenth World stays beautiful and smooth.


